Get Started with Kotlin on Android
Want to hit the ground running? Check out our
Kotlin
samples!
Kotlin is fully supported in Android Studio 3.0, so it's easy to create new projects with Kotlin files, add Kotlin files to your existing project, and convert Java language code to Kotlin. You can then use of all Android Studio's existing tools with your Kotlin code, such as autocomplete, lint checker, refactoring, debugging, and more.
This page shows you how to get started with Kotlin in Android Studio.
To learn more about the Kotlin language, take a look at
Resources to Learn Kotlin.

Using Kotlin with a new project requires just one extra click in the New Project wizard:
When you select an activity template, it will be provided in Kotlin code. Currently, only some the templates for the Phone and Tablet form factor are provided with idiomatic Kotlin code. The rest are automatically converted to Kotlin from the Java templates—you still get Kotlin code throughout, but some of the code might not use Kotlin's best language features yet.
Just like Java files, the Kotlin files are saved in the
If you want to add Kotlin code to an existing project, simply click File > New and select one of the various Android templates. If you don't see the list of templates in this menu, first open the Project window and select your app module.
In the wizard that appears, select Kotlin for the Source language.
Continue through the wizard, and you're done.
Alternatively, you can click File > New > Kotlin File/Class to create a basic file. The New Kotlin File/Class window provides several choices for the kind of file, but it doesn't matter which one you choose because Kotlin switches the file type automatically if you later change the declaration type.
By default, new Kotlin files are saved into
In Android Studio 3.0, open a Java file and select Code > Convert Java File to Kotlin File.
Or, create a new Kotlin file (File > New > Kotlin File/Class), and then paste your Java code into that file—when prompted, click Yes to convert the code to Kotlin. You can check Don't show this dialog next time, which makes it easy to dump Java code snippets into your Kotlin files.
Kotlin provides complete interoperability with the Java language, so calling the Android APIs often looks exactly like the matching Java code. Except now you can combine those method calls with Kotlin's syntax features.
Here are a few examples of what it looks like to call Android APIs in Kotlin, compared to the same code in Java language:
To learn more about the Kotlin language, take a look at
Resources to Learn Kotlin.
Via Developer.Android
Kotlin is fully supported in Android Studio 3.0, so it's easy to create new projects with Kotlin files, add Kotlin files to your existing project, and convert Java language code to Kotlin. You can then use of all Android Studio's existing tools with your Kotlin code, such as autocomplete, lint checker, refactoring, debugging, and more.
Create a new project with Kotlin
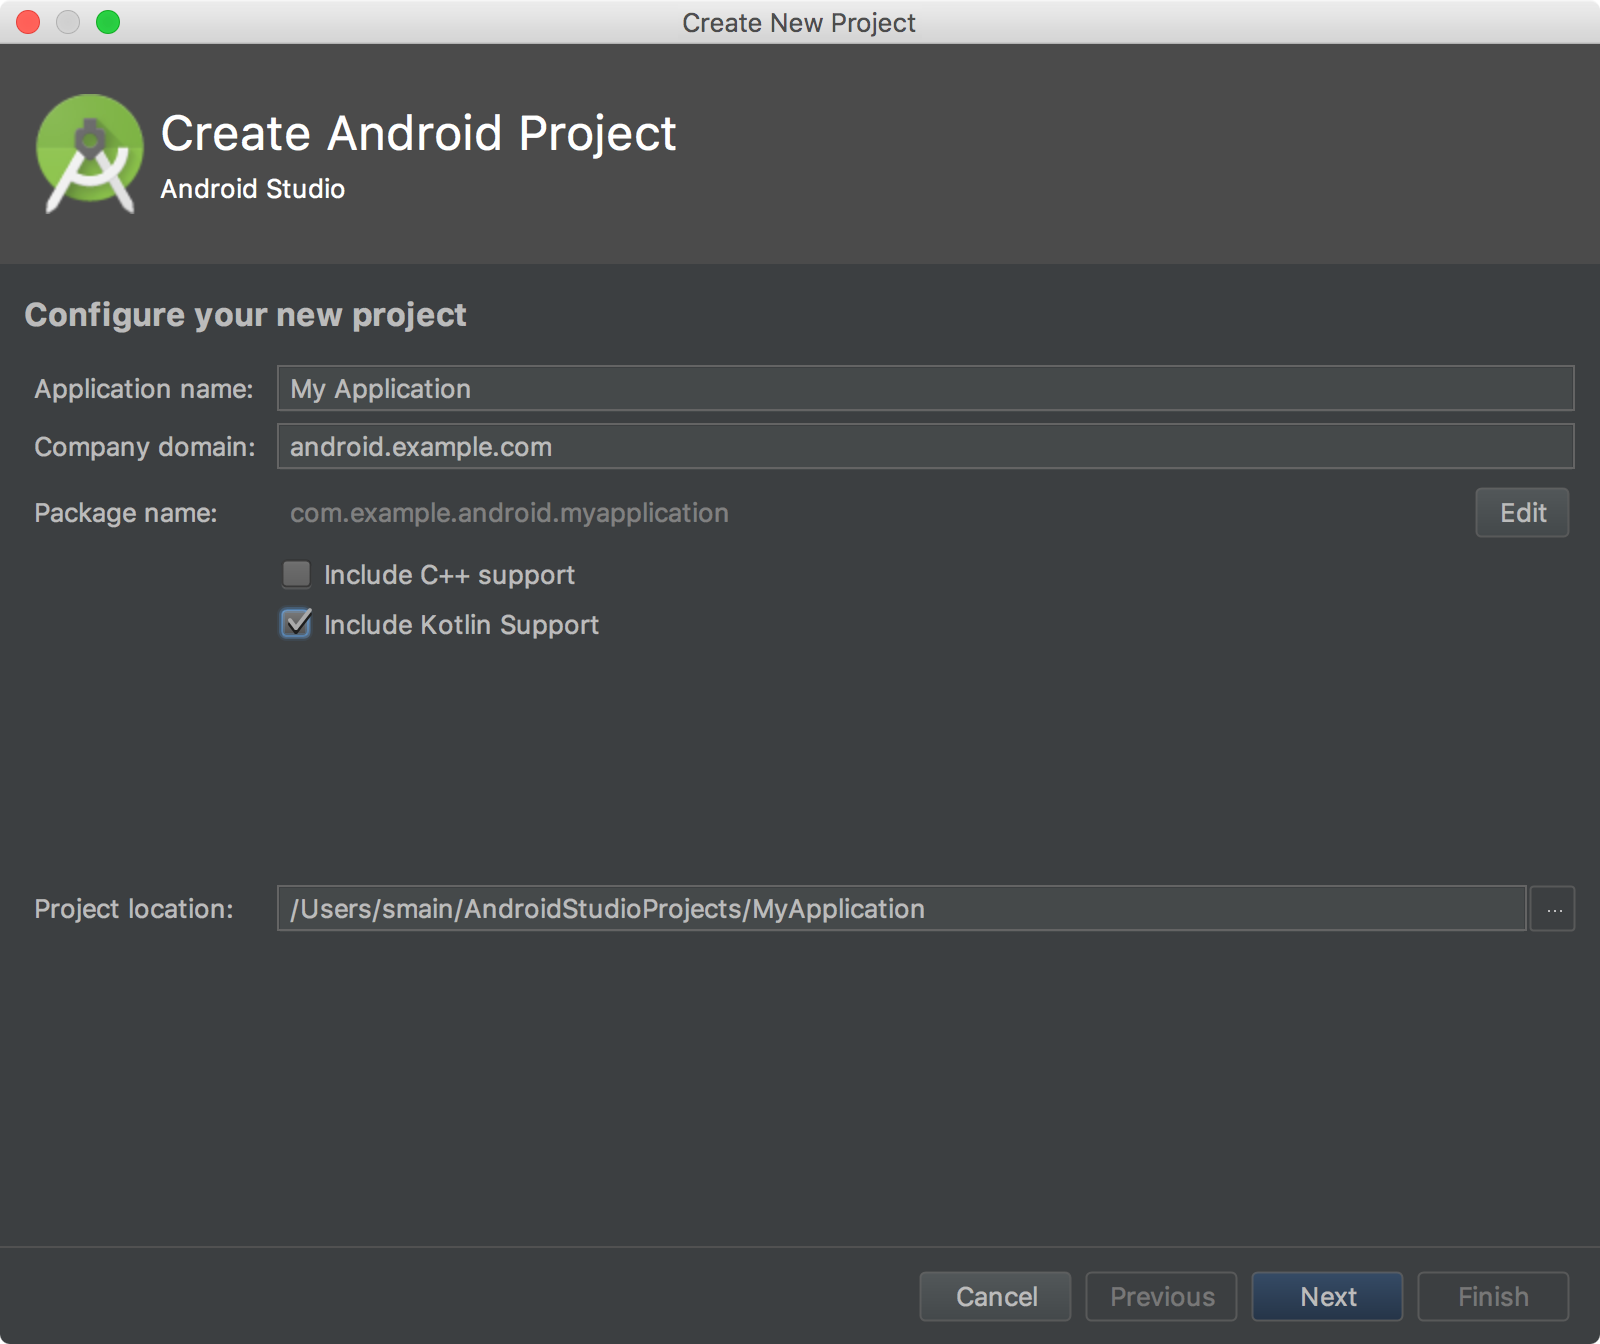
Using Kotlin with a new project requires just one extra click in the New Project wizard:
- In Android Studio, click File > New > New Project. Or if you've just opened Android Studio and see the Welcome to Android Studio window, click Start a new Android Studio project.
- On the first screen, check Include Kotlin support. That's the only difference.
- Click Next and continue through the wizard until you're done.
When you select an activity template, it will be provided in Kotlin code. Currently, only some the templates for the Phone and Tablet form factor are provided with idiomatic Kotlin code. The rest are automatically converted to Kotlin from the Java templates—you still get Kotlin code throughout, but some of the code might not use Kotlin's best language features yet.
Just like Java files, the Kotlin files are saved in the
src/main/java/
directory.Add Kotlin to an existing project
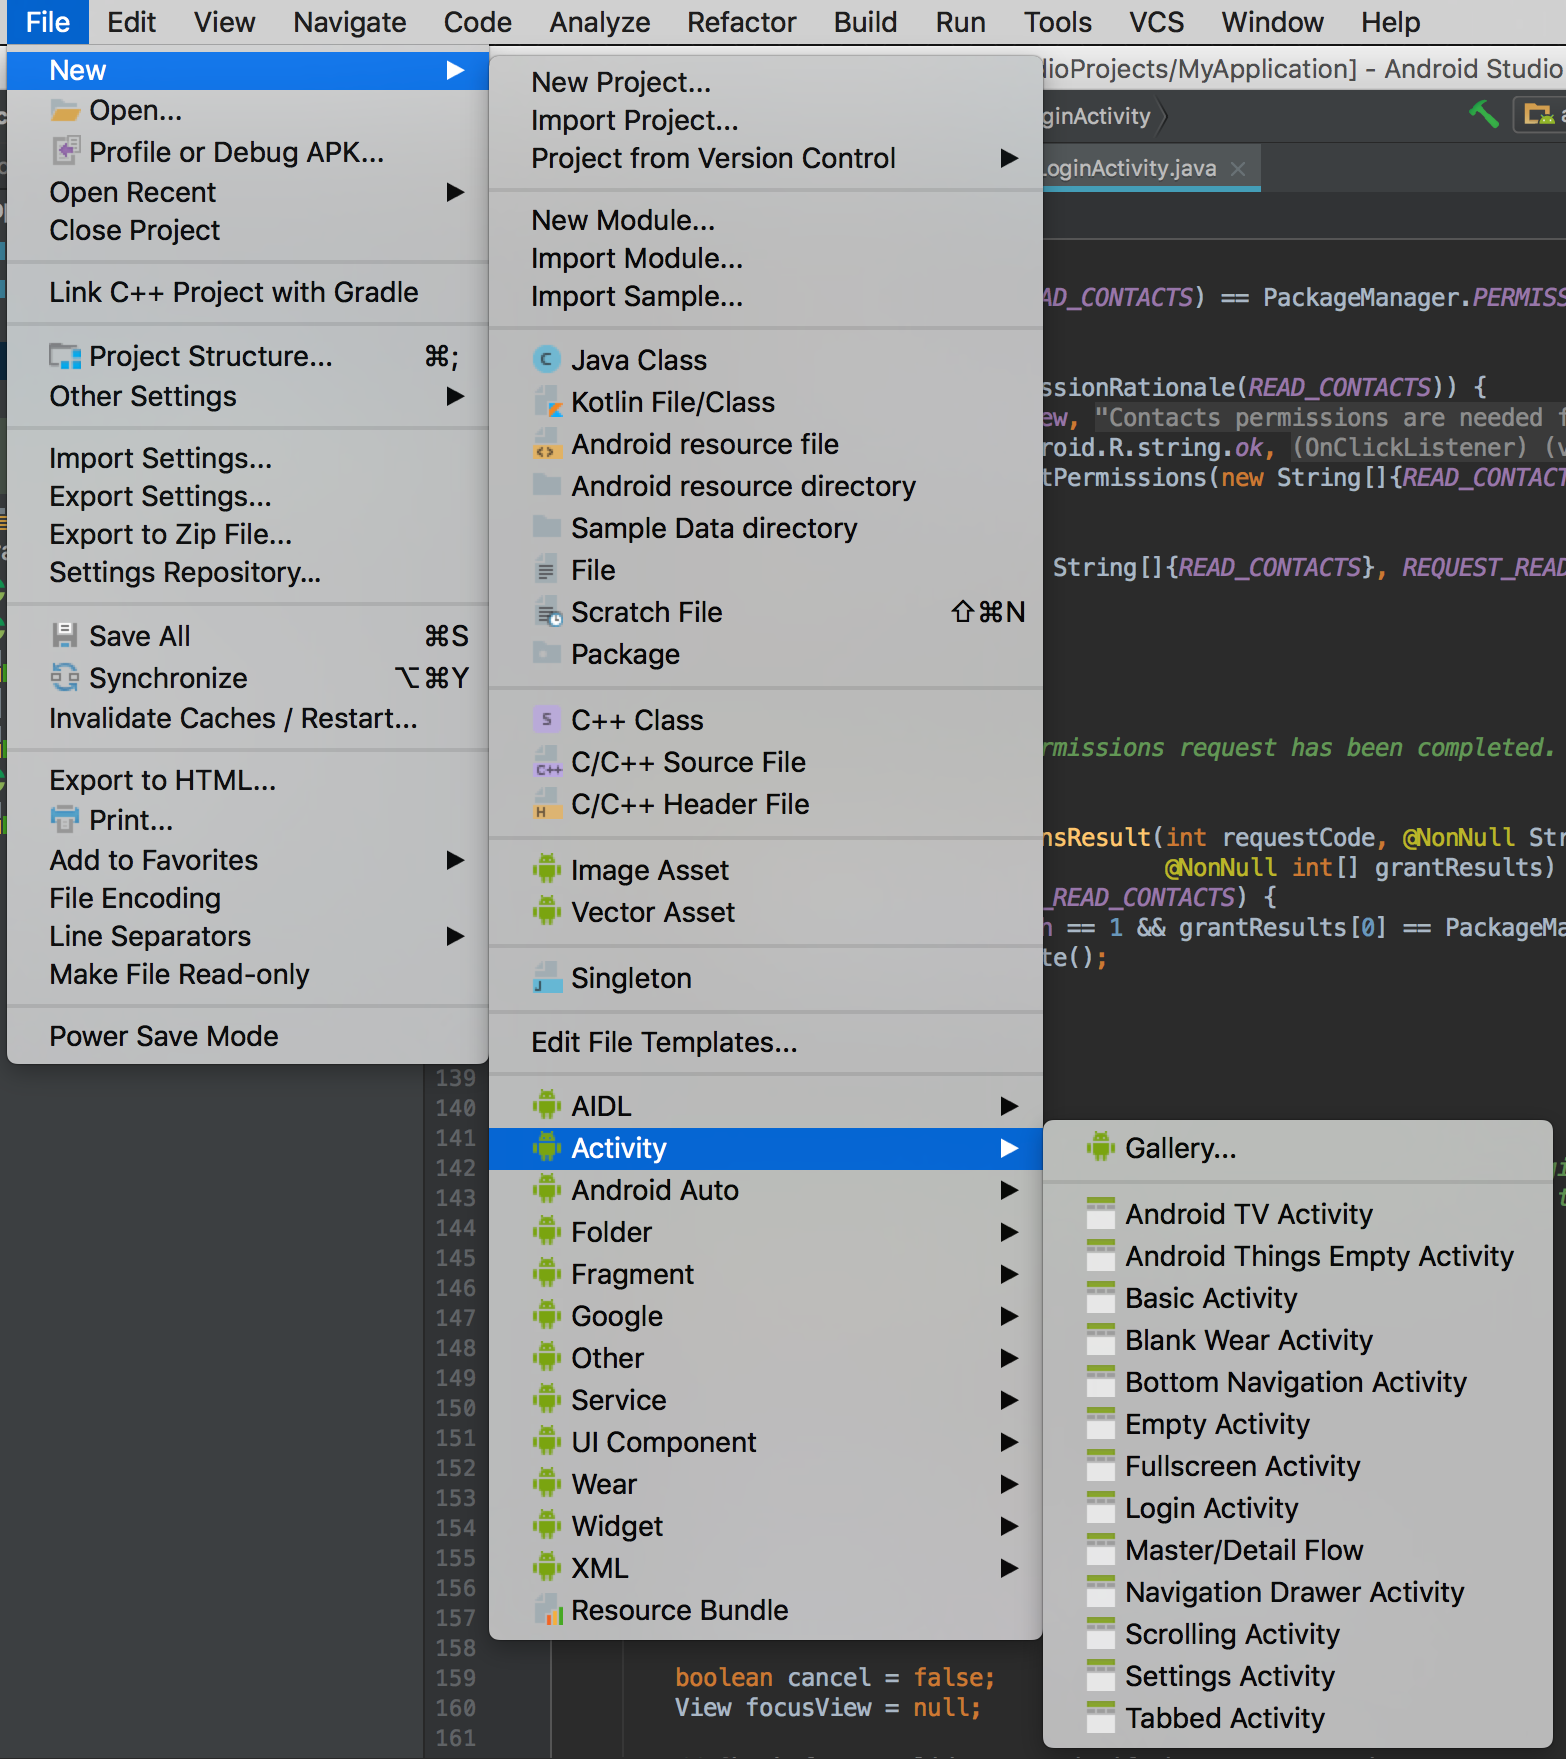
If you want to add Kotlin code to an existing project, simply click File > New and select one of the various Android templates. If you don't see the list of templates in this menu, first open the Project window and select your app module.
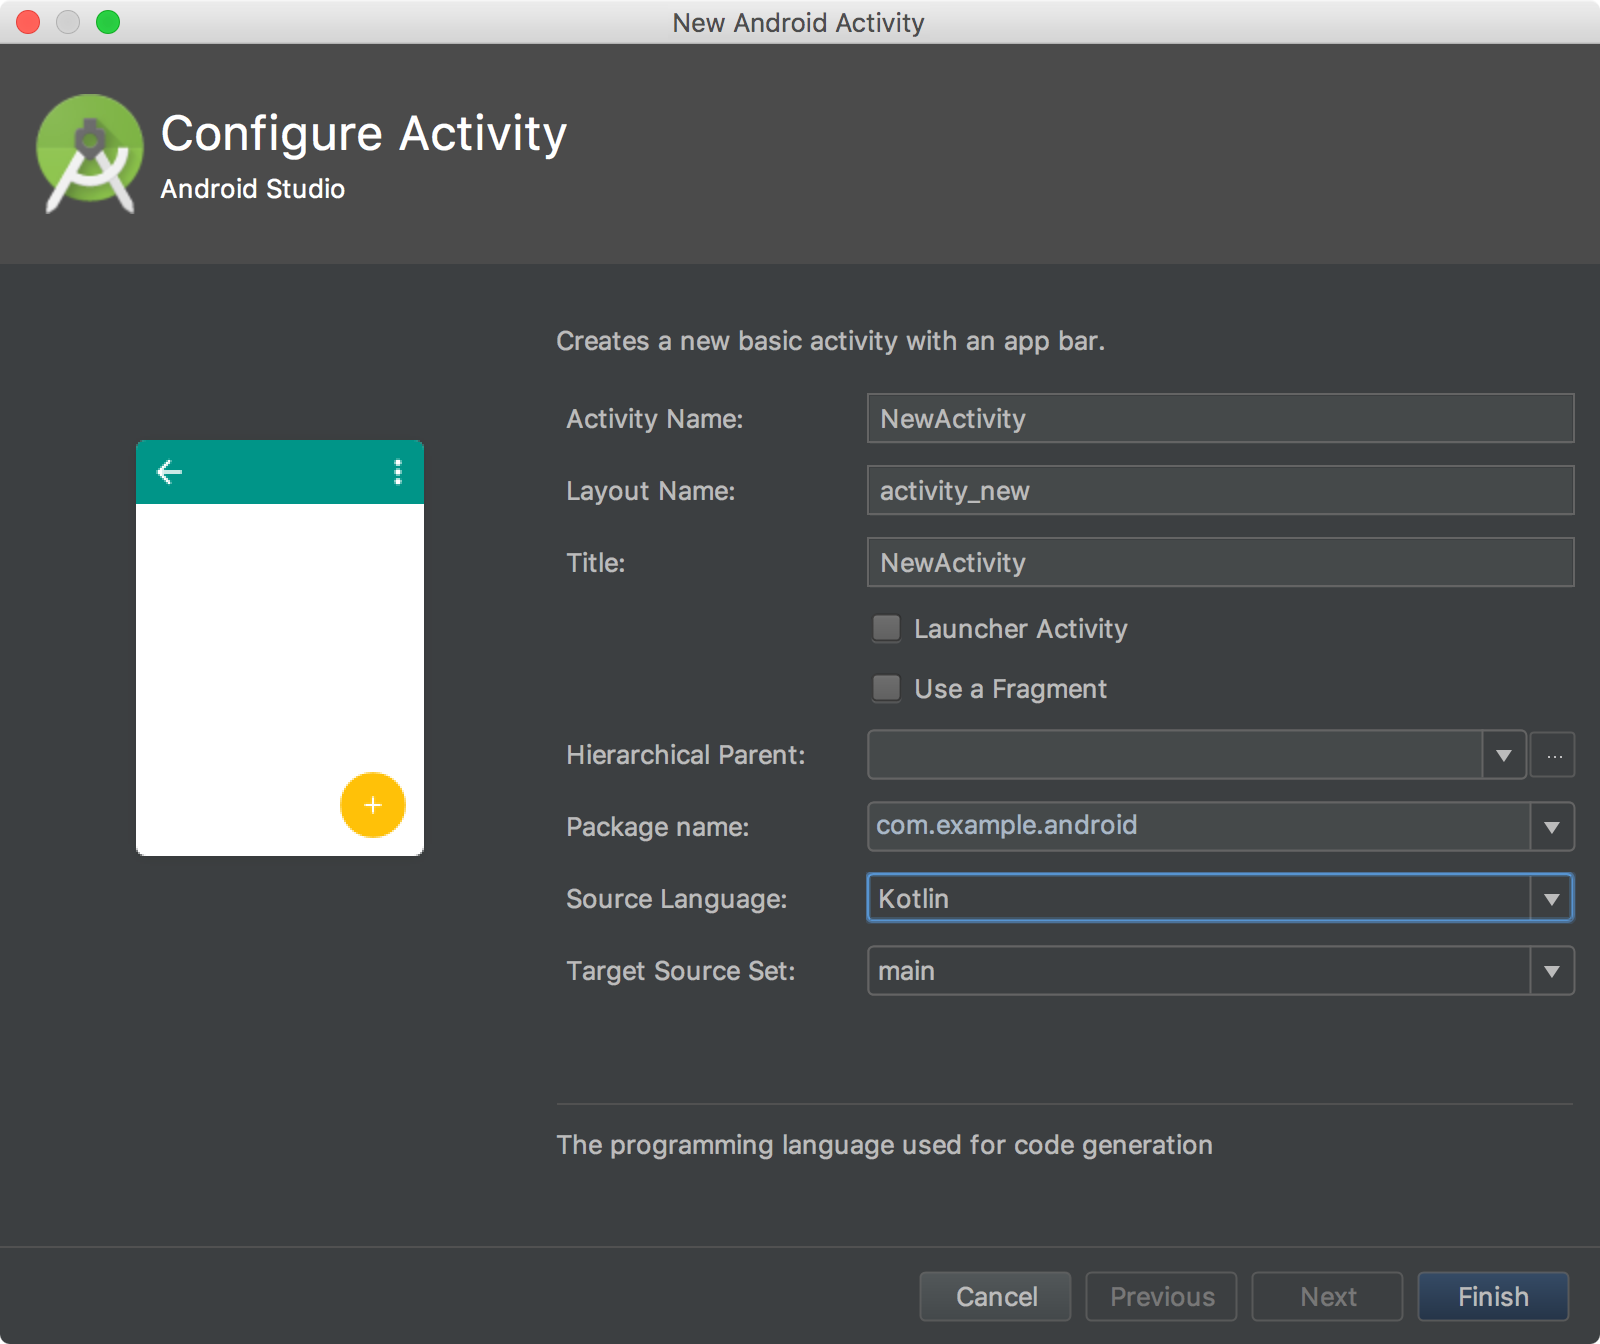
In the wizard that appears, select Kotlin for the Source language.
Continue through the wizard, and you're done.
Alternatively, you can click File > New > Kotlin File/Class to create a basic file. The New Kotlin File/Class window provides several choices for the kind of file, but it doesn't matter which one you choose because Kotlin switches the file type automatically if you later change the declaration type.
By default, new Kotlin files are saved into
src/main/java/. You might find
it's easier to see both Kotlin and Java files in one location. But if you'd
prefer to separate your Kotlin files from your Java files, you can put
Kotlin files under src/main/kotlin/ instead. If you do, then you need to
include this directory in your sourceSets
configuration:android {
sourceSets {
main.java.srcDirs += 'src/main/kotlin'
}
}
Convert existing Java code to Kotlin code
In Android Studio 3.0, open a Java file and select Code > Convert Java File to Kotlin File.
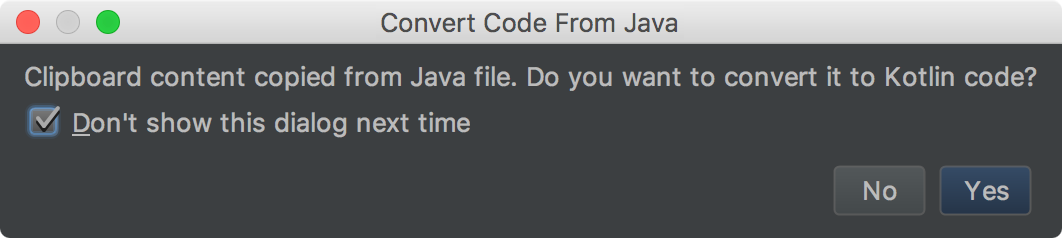
Or, create a new Kotlin file (File > New > Kotlin File/Class), and then paste your Java code into that file—when prompted, click Yes to convert the code to Kotlin. You can check Don't show this dialog next time, which makes it easy to dump Java code snippets into your Kotlin files.
Use Android APIs with Kotlin
Kotlin provides complete interoperability with the Java language, so calling the Android APIs often looks exactly like the matching Java code. Except now you can combine those method calls with Kotlin's syntax features.
Here are a few examples of what it looks like to call Android APIs in Kotlin, compared to the same code in Java language:
Declare Activity in Kotlin
class MyActivity : AppCompatActivity() {
  override fun onCreate(savedInstanceState: Bundle?) {
    super.onCreate(savedInstanceState)
    setContentView(R.layout.activity)
  }
}
Declare Activity in Java
public class MyActivity extends AppCompatActivity {
  @Override
  protected void onCreate(Bundle savedInstanceState) {
    super.onCreate(savedInstanceState);
    setContentView(R.layout.activity);
  }
}
On-click listener in Kotlin
val fab = findViewById(R.id.fab) as FloatingActionButton
fab.setOnClickListener {
  ...
}
On-click listener in Java
FloatingActionButton fab = (FloatingActionButton) findViewById(R.id.fab);
fab.setOnClickListener(new View.OnClickListener() {
  @Override
  public void onClick(View view) {
    ...
  }
});
Item click listener in Kotlin
private val mOnNavigationItemSelectedListener
    = BottomNavigationView.OnNavigationItemSelectedListener { item ->
  when (item.itemId) {
    R.id.navigation_home -> {
      mTextMessage.setText(R.string.title_home)
      return@OnNavigationItemSelectedListener true
    }
    R.id.navigation_dashboard -> {
      mTextMessage.setText(R.string.title_dashboard)
      return@OnNavigationItemSelectedListener true
    }
 }
 false
}
Item click listener in Java
private BottomNavigationView.OnNavigationItemSelectedListener mOnNavigationItemSelectedListener
    = new BottomNavigationView.OnNavigationItemSelectedListener() {
  @Override
  public boolean onNavigationItemSelected(@NonNull MenuItem item) {
    switch (item.getItemId()) {
      case R.id.navigation_home:
        mTextMessage.setText(R.string.title_home);
        return true;
      case R.id.navigation_dashboard:
        mTextMessage.setText(R.string.title_dashboard);
        return true;
    }
    return false;
  }
};
Via Developer.Android


Post a Comment